


Xenon to full LED Headlights Retrofit
Status:
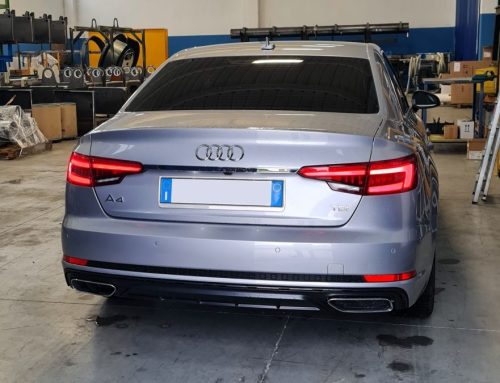
This retrofit has been succesfully implemented and tested on mine A4 B9, and it’s still active.
Needed parts:
Price:

1000 €
Before you begin:
- You must buy kufatec wiring harness or make cable and connectors by yourself
- Make a backup of all coding and adaptations of your BCM1 before you begin
- You must have ODIS and VAS5054 / VAS6054 with a GEKO login code to do CP removal
- You must own the corresponding dataset for your new highline BCM1 with the configuration that matches your optionals. I bought the dataset and uploaded with ODIS, the dataset is NOT present in the VCP servers.

1 – Unmount front bumper


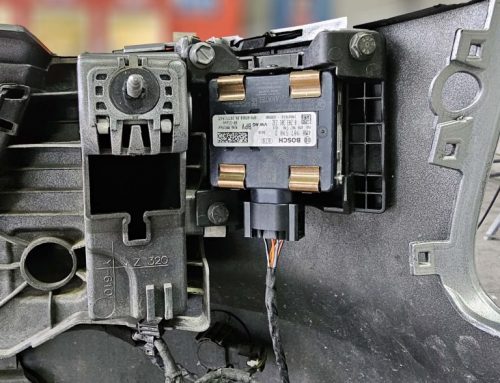
2 – Place wiring harness and new BCM1
Old Xenon BCM1 part number: 8W0 907 063 CC
New Highline BCM1 part number: 8W0 907 063 CG

Highline BCM1 8W0 907 063 CG pinout:

The Kufatec wiring comes with 4 additionals crimped connectors cable:
- CAN-HIGH – T73a/43 [two cables crimped]
- CAN-LOW – T73a/42 [two cables crimped]
- Positive ignition SB13
- Positive ignition SB12
The cable on the left shown in the photo is not needed, as we are retrofitting LED headlights and not Matrix LED headlights.
That cable goes from the A5 module to the 09 module but it is not needed in this retrofit.
")

The Kufatec wiring comes with 4 additionals crimped connectors cable:
- CAN-HIGH – T73a/43 [two cables crimped]
- CAN-LOW – T73a/42 [two cables crimped]
- Positive ignition SB13
- Positive ignition SB12
The correct wiring should be:
- CAN-HIGH MX1 Left – T73a/43
- CAN-LOW MX1 Left – T73a/42
- CAN-HIGH MX2 Right – T73b/42
- CAN-LOW MX2 Right – T73b/43
So you should separate the CAN cables, identify which one goes to the left and right connector and hook them up as shown in the schematics.
")

")
")
3 – CP removal
You need to use ODIS and VAS5054 / 6054 with GEKO login code
The photos below are taken from the internet.


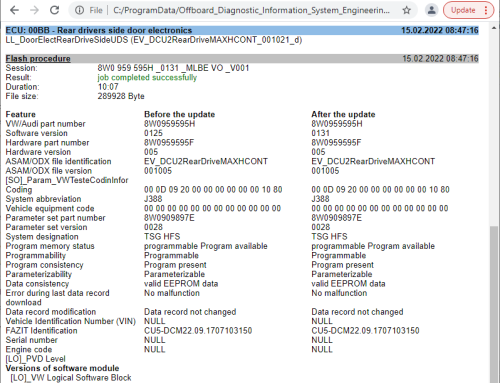
4 – Parametrize BCM1 – D6 – D7 – 29 – 39 module
You need to find or buy the original dataset for your new BCM1 highline with the configuration that matches your car’s optionals.
You need to upload parameter data with ODIS, select 09 control module and then on the right select “010 – Data Transfer” section and select the XML file to upload.
Once selected, hit “Write data record”

5 – Restore the original coding of BCM1
Upload the original coding and adaptions that you’ve backed up with VCP \ VCDS and restore it to the new BCM1.


Scrivi un commento